
|
Do not attempt to use this Guide if you have only Titan Quest. You must also have the expansion: Titan Quest: Immortal Throne |
Tools needed
You have to download and install these tools prior to start this Guide.
1) Get the TexViewer Modding Tool, it's used to view the textures in the database files.
2) Get the ARC Explorer for browsing and export files from Titan Quest's ARC (database/resource) files.
3) Get TQVault. It's used to extract all database.arz files.
4) ArtManager is the program in your Immortal Throne folder, where most of the editing will be done.
5) Latest Titan Quest fan patch. It's version 1.17 as of now. Install it.
6) You might also want to have an image editing software. Gimp is recommended, unless you are already a Photoshop user. You can do without editing images, but your custom mastery won't be fully custom.
Getting Started
Launch ArtManager in your Immortal Throne folder (not the on in Titan Quest folder!). Click Tools -> Options.
Here is a proposition of how to set up the directories (replace <username> with the name of your windows user):
Working directory : C:\Documents and Settings\<username>\My Documents\My Games\Titan Quest - Immortal Throne\Working\
Build directory : C:\Documents and Settings\<username>\My Documents\My Games\Titan Quest - Immortal Throne\CustomMaps\
Tools directory : C:\Program Files\THQ\Titan Quest Immortal Throne <--- This is the directory where you installed the TQIT game, and where the program ArtManager.exe is.
Additional browse directories : C:\Program Files\THQ\Titan Quest Immortal Throne, C:\Documents and Settings\<username>\My Documents\My Games\Titan Quest - Immortal Throne\Working\CustomMaps\
The Working and Build directories can be whatever you want, but the locations listed are good enough as a default. If you never made a Mod, they probably don't exist. You will probably have the directory "C:\Documents and Settings\<username>\My Documents\My Games\Titan Quest - Immortal Throne" though, and all you have to do is to create the "Working" subdirectory under the "Titan Quest - Immortal Throne" directory above. The same has to be done for the "CustomMaps" directory - create it under the "Titan Quest - Immortal Throne" directory.

|
Vista users don't have a "C:\Documents and Settings\<username>\My Documents\" directory.
Follow the instructions above with "C:\Users\<username>\Documents" instead |
.
Don't forget to point the Tools directory to the Art Manager in the Titan Quest Immortal Throne folder (NOT the Titan Quest original game folder). One of the folders on the Additional browse directories folder must be the folder where your template folder will be.
Once you've set up the folders, on the Art Manager, click Help -> install templates.
Then create a "Mod", which will be used to store all database files, and will not be edited. Give it a meaningful name, like AllDatabaseFilesStorage. This gives a good idea what this "Mod" directory is about. This is NOT your Mod yet, but it's a necessary step of the setup. You need to do it only once, before you start creating Mods
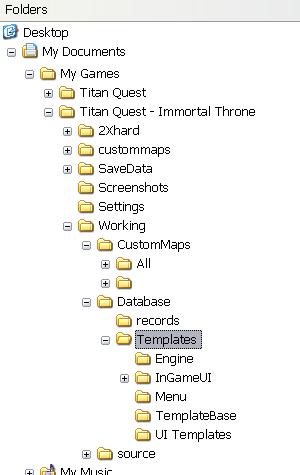
Download the templates that can be found on this link. The file that you downloaded from the link is in compacted format and has inside a "Templates" subdirectory. This "Templates" directory has to be unzipped to under that folder that you have listed under Additional browse directories.
If you used the same structure as has been suggested previously, your templates folder should look like this:
C:\Documents and Settings\*username*\My Documents\My Games\Titan Quest - Immortal Throne\Working\Database\Templates
Folders structure with Templates
As it can be seen on the picture above, the templates folder has some subfolders, engine, InGameUI etc. and inside them a lot of .tpl files.
Creating your Mod
Now you can create a new mod. Click Mod -> new, and give it a name, for example: "MyMasteries". Then hit Build -> build (F7). This will create the "MyMasteries" mod.
Then launch TQ Vault. Locate a button called "extract database.arz". When you click it, a window opens. Set up the extraction folders, use the same file paths. It takes a while. Once it finishes, go to the folder you exctracted the files to. Cut and paste the database folder in C:\Documents and Settings\*username*\My Documents\My Games\Titan Quest - Immortal Throne\Working\CustomMaps\*mod folder*.
That *mod folder* is the name of the mod you created to hold all database files. Mine is called simply "AllDatabseFilesStorage". My path looksl ike this: C:\Documents and Settings\*username*\My Documents\My Games\Titan Quest - Immortal Throne\Working\CustomMaps\AllDatabseFilesStorage\database\records and in the records folder, there's a lot of other folders, like controllers, controls, creature etc.
Now load up Art Manager and load your mod. You can have another instance of Art Manager open. Load the "AllDatabseFilesStorage" mod there. It takes a while to load all those files.
Select the Art Manager instance that your mod is loaded with. You should see three tabs there, Sources, Assets and Database.
The sources tab is used to import custom resources, such as images and sounds. The assets tab will show your custom resources that are at your disposal. The database tab will show all your imported and edited database files.
Now you should select which mastery you want to replace. It can be basically any you like. The masteries are enumerated from 1 to 9. Matery 5 is Rogue (called stealth in some folders too) for example.
NOTE: Don't modify the "AllDatabseFilesStorage" mod, it's there for reference. You can browse things there without impoting them, to look around, to see what you should import to your real mod. If you want to mass import things to your real mod, it's quicker to copy them from
"AllDatabseFilesStorage" mod's subfolder to your real mod's subfolder in Windows Explorer.
We can start importing things now. Click Database -> Import and browse
records\skills\stealth\stealthmastery.dbr and records\skills\stealth\stealthskilltree.dbr
I'm just using rogue (also called stealth on lot of places) as an example. You can edit some other mastery if you like. The skilltree contains a list of the skills in the mastery. The mastery.dbr contains the information about what happens when you increase your mastery level.
Now browse back to the records\skills\stealth folder in the pane that is on the left in ArtManager. Copy and paste both the mastery.dbr and skilltree.dbr you just imported and name them something else. like xxxstealthmastery.dbr and xxxstealthskkilltree.dbr.
Open (double click on it) your xxxstealthmastery.dbr. Browse to UI Information on the left. Some information appears, like skillDisplayName, skillBaseDescription and so on. Check the tagSkillNamexxx (xxx is some number). It tells you where the text for the mastery is. We'll want to customize it of course. Double click on tagSkillNamexxx, and put something else there. I like to use the same format. You can write tagSkillName1001 there for example.
The numbers up to about 240 are already used for the original skills, so use a larger number. Edit also the tagSkillDescription, use the same number as you did for the tagSkillName. These to text entries appear in-game whne you hover your mouse over the "+" button you use to increase the level of your mastery, to unlock skills. Once you've done editing, hit file -> save in the xxxstealthmastery.dbr window. NOTE: Never hit file -> exit in .dbr files, it will exit the whole ArtManager. Use the X in the upper right corner instead.
Now go to the sources tab I talked about earlier. You should see text folder there. Click it.
Now you should see ModStrings.txt on the right. Open it. Put the line from the xxxstealthmastery.dbr skillDisplayName in the text file. For example if you wrote tagSkillName1001 there, put it here too.
Make it like this (where 1001 is the number you've used)
tagSkillName1001=Custom mastery tagSkillDescription1001=This is an awesome mastery
The text after "=" will appear in the game. Save the modstring file and close it. Right-click the mosdtring file and hit auto-create assert. Then hit build -> build. Now the custom strings will work. You don't have to use the auto-create assert for modstring again, just edit the modstring file. Now you now how to create custom text for you mod.
Go back to the xxxstealthmastery.dbr, and browse to character parameters\character bonus attributes. On the right you can edit the stat boosts you get when leveling up. It should be relatively simple to edit the values if you want to do so. After you've all set, save the dbr file and close it.
You should be at records\skills\stealth folder now. Pick one of your custom skills, and try to think of a skill that works similarly in the original game. It can be any skill, it doesn't have to be from the same mastery. Then click Database -> import record and browse the skill. Note the file path and once you've imported the skill, browse the location in the left pane of ArtManager.
You can also import things like this:
[IMG]http://i164.photobucket.com/albums/u14/Poinas/hlp06.jpg[/IMG]
Right click, and browse the "AllDatabaseFilesStorage" folder.
Rename the skill and copy it to your xxx mastery folder, the same where your xxxstealthmastery.dbr is. You can delete the original file you imported.
Open the skill you imported and renamed. Browse to UI information. Edit the skillDisplayName and ModStrings accordingly.
Under skillDisplayName you can see skillUpBitmapName and skillDownBitmapName. They hold the information about the in-game skill icon textures. You can change the .tex file to any other skill icon that already exists in the game, or create you own.
If you want to create your own, here's how to do it. Open up your image editing tool, create the image and save it as .tga or .psd. You can browse the existing in-game images with arc explorer, which you probably now have after reading the guide. The following folders contain all .arc files that the game uses: titan quest\resources, immortal throne\resources, immortal throne\resources\xpack
The icons are in titan quest\resources\InGameUI.arc -> detailmap\icons\skills. Each icon has up and down icons, be sure to edit/create both. you can extract these .tex files with arc explorer.
Select the file you want, and hit extract -> selected file. Once you're all set, open up tex viewer that you should now have. Open your extracted file with it. With view -> properties you can check the image dimensions. Click file -> export. Name the file to somenamehere.tga and choose tga format. Don't use the original file name. If you don't write .tga at the end of the file name, the program will crash.
Then open the exported .tga in your image editor, edit it and save it as .tga or .psd.
Go to ArtManager, sources tab. There should be three folders, maps, quests and tex. Create another one, images or whatever. Right-click on modname\source to do that. Then select the folder you created and inside it, on the right side of the ArtManager window, right click and choose import, select your file. Once the file is imported, right-click on it and select auto-create asset.
Choose bitmap, not texture. You shoul select bitmap for all icons mentioned in this guide. You should now be able to find your file as .tex file in assets tab. Hit buld -> build.
Now browse the skill you were editing, and in UiInformation, double click the .tex file and browse your own.
SkillConnectionOff and skillConnectionOn are important if you're going to have an "upgrade" skill for your skill. In-game you can see skills are connected with [ . These entries maintain those connections. You don't have to have an upgrade skill. If you don't have one, empty the field.
SkillBarBottom off01.tex should always be the first item on the list. It's the lower part of the [. Skill connectionOff01 is just a | . You should always end with skillbartopoff01. This will clarify things a bit:
[IMG]http://i164.photobucket.com/albums/u14/Poinas/guide_3.jpg[/IMG]
Try it in-game and you'll get the hang of it.
Edit the skill's damage and other things you like, then save and close the file.
Now here's something that's good to know about templates when creating custom skills. Templates are just ways to format data. Whenever you create a new database entry, you must select a template for it.
If you create a new skill for example, and choose "TemplateMeleeHit" and not "TemplateProjectileHit" (I made up these template names), the things you can define are different.
With "TemplateProjectileHit", there is a data field for modifying projectile speed, but "TemplateMeleeHit", the data field is not there. So it's important to choose the correct template for your skill. In the early stages of your modding career, it's a good idea to think of a skill that already exists in the game. Then import, rename and edit it.
Hit F7 to build the mod. That makes things you've created visible for browsing. Now we open xxxskilltree.dbr again. Go to All groups\skill list. In skillName1, you can see StealthMastery.dbr. Browse your custom xxxmastery.dbr there. Then in skillName2, browse to your custom skill you just created. When adding skills, you must add them all here. Save and close the file.
Now import records\ingameui\player skills\mastery x\ where x is the number of the mastery you're editing. Import all dbr's in that folder. An easier way is to go to My Documents\My Games\Titan Quest - Immortal Throne\Working\CustomMaps\AllDatabaseFilesStorage\database\records\ingameui\player skills\ in windows explorer. That "all" folder is the one where you extracter all your titan quest database files.
Copy the mastery x folder to My Documents\My Games\Titan Quest - Immortal Throne\Working\CustomMaps\*yourmodname*\database\records\ingameui\player skills\mastery x
Then go to ArtManager and hit build -> build. You may have to exit ArtManager and reload your mod to make custom files visible. Browse to records\ingameui\mastery 5 (or whatever your mastery number is). Open mastery.dbr. Go to Config, skillName. Browse your custom xxxmastery.dbr. Save and exit.
Masterybar.dbr holds the texture for the skillbar than grows when you increase your mastery level. You can edit/create a .tex file if you like, or leave it alone.
masterybitmap.dbr contains the .tex file that is next to your skills, in the upper right corner. It's the small round pic, 175x175 in size. Note that the slot is round, so you may have to play with alpha (transparency) channel. You can easily add an alpha channel to your image with Gimp.
The panectrl.dbr in this folder gets overridden by the one in xpack\ui\skills\mastery x. Import the xpack panectrl. Go to config and edit the tags as you did before. You can edit other things here if you know what you're doing, but leave them alone for now. If you have more skills than 20, then add skill21, skill22 etc. to the list in tabSkillButtons. You can only have 25 items in this list, and masteryskillbar is one of them. That leaves you with 24 additional skills.
Go back to records\ingameui\player skills\mastery x\. Open skill01.dbr. Go to config -> skillName. Browse your custom skill. isCircular tells the game if the icon is circular or not. 0 = square, 1 = circle. bitMapNameUp and bitMapNameDown define the borders of the icon. InGameUI\SkillButtonBorder01.tex -> square, InGameUI\SkillButtonBorderRound01.tex -> circle. Add or remove "round" there depending on your skill. You don't need to browse anything, you can write the path to the field. That works for all entries. If you know the correct folder, it may be easier to edit the existing entry instead of browsing for the file.
bitMapPositionX and bitmapPositinY tell the game the X- and Y coordinates of you icon. It's a 6x6 grid by default, 7x6 if you mod it:
[IMG]http://i164.photobucket.com/albums/u14/Poinas/gridusable.jpg[/IMG] [SIZE=1][I]Picture provided by Munderbunny[/I][/SIZE]
skillpanebasebitmap.dbr contains the backround pic of your skill tab. It's 919x540 in size if you want to edit it. Use arc explorer to browse titan quest\resources\InGameUI.arc -> detailmap\icons\skills\defenseskillbackground.tex. Export it and extract with tex viewer.
Then import (or copy manually in windows explorer) records\ingameui\player skills\select mastery\masteryxbutton.dbr and records\ingameui\player skills\select masterymasteryxtext.dbr
x is again the number of your mastery. The button file contains the small mastery icon in mastery selection screen. There are four of them, they are 80x80 pixels in size. Buttondisabled is used when you're selecting a mastery and you've already selected certain mastery. Button up is used when the mastery is available for selection. Buttonover is used when you hover your mouse over the button. Button down is used when you click the button. You can export the images of some existing mastery with arcexplorer from titan quest\resources\InGameUI.arc -> detailmap\skills. masteryxText contains the text that is displayed under the icon. Note that is has to be very short, or else it will not fit the slot. About 14 characters max.
Import records\xpack\ui\skills\select mastery\masteryxbutton.dbr and records\xpack\ui\skills\select mastery\masteryxtext.dbr.
Those files contain the .tex files and strings that are used in mastery selection window. Replace them with custom things.
Import records\xpack\ui\skills\select mastery\masterypane.dbr. Create a custom tag for your mastery for masteryMasterySelectedDescriptionTags table. Create custom image for masteryMasterySelectedBitmapNames. That bitmap appears at the center of the screen when you hover your mouse over your mastery button in character selection screen. It's 226x226 in size.
Almost done!
Now import records\xpack\creatures\pc\malepc01.dbr and records\xpack\creatures\pc\femalepc01.dbr.
Open them and edit skill trees. Replace skillTreex with your own, where x is yet again the number of your mastery.
You may already have a name for your class. The class text in character screen, above attributes can be changed too. Here's a list of the original strings:
// <- what's after these are comments to explain the class
tagCClass01=Theurgist //Spirit tagCClass02=Wanderer // Nature tagCClass03=Rogue // Rogue tagCClass04=Hunter // Hunting tagCClass05=Stormcaller // Storm tagCClass06=Pyromancer // Earth tagCClass07=Defender // Defense tagCClass08=Warrior // Warfare tagCClass09=Spellbreaker // Warfare + Spirit tagCClass10=Champion // Warfare + Nature tagCClass11=Assassin // Warfare + Rogue tagCClass12=Slayer // Warfare + Hunting tagCClass13=Thane // Warfare + Storm tagCClass14=Battlemage // Warfare + Earth tagCClass15=Conqueror // Warfare + Defense tagCClass16=Spellbinder // Defense + Spirit tagCClass17=Guardian // Defense + Nature tagCClass18=Corsair // Defense + Rogue tagCClass19=Warden // Defense + Hunting tagCClass20=Paladin // Defense + Storm tagCClass21=Juggernaut // Defense + Earth tagCClass22=Conjurer // Earth + Spirit tagCClass23=Summoner // Earth + Nature tagCClass24=Magician // Earth + Rogue tagCClass25=Avenger // Earth + Hunting tagCClass26=Elementalist // Earth + Storm tagCClass27=Oracle // Storm + Spirit tagCClass28=Druid // Storm + Nature tagCClass29=Sorcerer // Storm + Rogue tagCClass30=Sage // Storm + Hunting tagCClass31=Bone Charmer // Hunting + Spirit tagCClass32=Ranger // Hunting + Nature tagCClass33=Brigand // Hunting + Rogue tagCClass34=Warlock // Rogue + Spirit tagCClass35=Illusionist // Rogue + Nature tagCClass36=Soothsayer // Spirit + Nature xtagCharacterClass01=Seer // Dream xtagCharacterClass02=Harbinger // Dream + Warfare xtagCharacterClass03=Templar // Dream + Defense xtagCharacterClass04=Evoker // Dream + Earth xtagCharacterClass05=Prophet // Dream + Storm xtagCharacterClass06=Haruspex // Dream + Hunting xtagCharacterClass07=Dreamkiller // Dream + Rogue xtagCharacterClass08=Ritualist // Dream + Nature xtagCharacterClass09=Diviner // Dream + Spirit
Add the strings you need to modify to your Modstrings.txt. Modify and save, then they work in-game. No need to change dbr files.
Save, close, hit build -> build and you're done. You now have yourself an brand-spanking new custom mastery! You may want to add more skills though.
Launch Immortal Throne, your mod will be in custom game menu. Have fun!! You can start editing your mastery now. Make changes build the mod (F7) and launch the game to check the changes.
But were not completely done yet, there's more!
You may want to use custom sounds. They have to be 44100 Hz, mono and 16 bit in order to work correctly. .wav and .mp3 files are both supported. Larger sound files should be .mp3, because .wav requires more HD space.
Go to ArtManager, load your mod. Go to sources tab. Create a new folder, like "sounds", and import your custom sound there. Click auto-create asset, build, and your is ready to be used. Go to database tab. Create a new folder (right click on some folder), under records. Go to the folder you created. On the right pane, right-click and select new -> record. Double-click on the new record. You must now browse for a template. The default template for sounds is in your templates folder and it is called soundpak.tpl. One that is done, open the new record again. Go to sound properties. Double-click "soundName1". Browse for your custom sound. Save and close the file. You may want to rename it at this stage.
No go to some custom skill, open it. Click "skill sound" (NOTE: Some skills may not have that depending on the template). You can assign the .dbr file you just created to "skillSwipeSound" or "skillSound1" etc. That's all there is to it.
I'd like to mention something about custom effects. Explosion, projectiles, auras etc. You can create them/ edit existing ones with PSEditor, which can be found in your Immortal Throne folder.
If you want to edit existing effects, then open arcexplorer. Browse to titan quest\resources\effects.arc. Then click extract -> all files. Extract to any folder you like. Then open immortal throne\resources\effects.arc. Exctract it too. There's only a few files. These are modified files that were added in the expansion. You should put these files in the folder you extracted the first files to, to replace the old ones. Then extract immortal throne\resources\xpack\effects.arc. Extract them to a different folder.
Now you should put the first folder in C:\Documents and Settings\*username*\My Documents\My Games\Titan Quest - Immortal Throne\Working\source\*somefolder*. I used "effects" for *somefolder*. Move the first files you extracted to this folder. Then I created "Xpack" folder in effects, and put the extracted immortal throne effects.arc files there.
Now laucnh PSEditor and you should be able to browse the effects. Open one up. Play around with things. It may look confusing at first, but it's not too bad. I may write more about editing effects later.
Once your done, save the effect. Go to ArtManager, load your mod. Go to sources tab. Create a new folder, like "effects", and import your custom effect there. Click auto-create asset, build, and your effect is ready to be used.